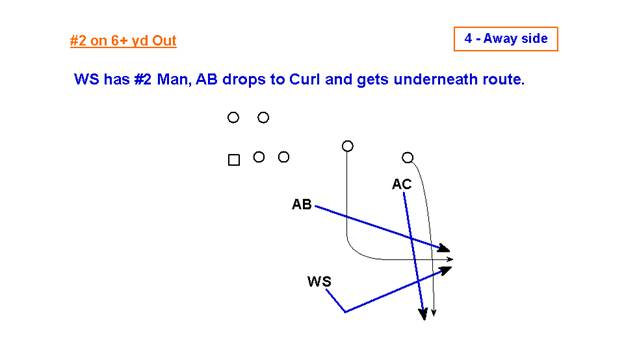
The last diagram is with 2 on a Deep Out. Really, if your inside foot is up, there are not a lot of break points that a WR can run with a speed cut. If he runs a Speed Out, he will roll the route after his 2nd step at 3 yds and round it to 5 yds. If he runs the Deep Out, he will roll it after his 6th step at 10 yds and round it to 12 yds. Teams will also run a Square Out at 5-6 yds and at about 10 yds, but you can see the WR breaking down before those square cuts.
The Safety will read #2, and if he is going full speed and gets a yard past the LB (putting him at a depth of at least 6 yds), I tell my WS that he now has him Man and to expect the Deep Out, Go, or Post route. I don't want him to be indecisive on whether or not to switch, and I don’t want him to hesitate and wait for the 7 or 8 or 9 yd Out that will never happen. I don't like any gray areas—I want everything as black and white as possible with this coverage.
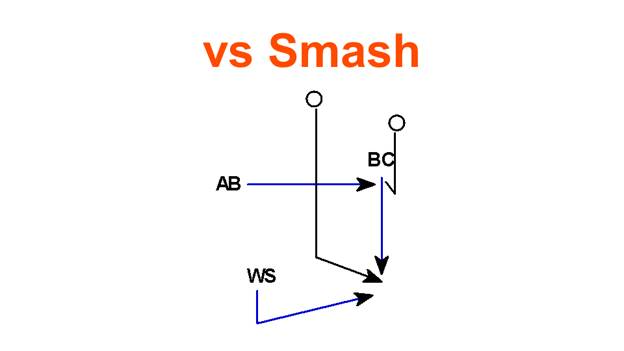
I want the Safety aligned two yds inside 2 to protect the MOF (middle of the field) because he doesn't have any help there. If they run Smash (2 on a Corner and 1 on a Hitch), the Safety is at a disadvantage because he has inside leverage, but he will have help from the Away-Side Corner getting depth under the Corner route of 2. We will also make a "Smash" call like most teams do, which tells our AB to smash #1 in the face right now on the Hitch or In route.