Featured courses
- The Ultimate Guide to Coaching Track and Field by Jackson Chlebowy
- How TCU Coach Khadevis Robinson Builds Mental Toughness for Big 12 Track by William Markey
- Two Points of Focus When Coaching and Training Hurdles by Grant Young
- Four Keys to Maximize Winning Potential in a 400m Race by Grant Young
- Three Lessons Every Distance Running Coach Should Know by Grant Young
- Olympic Medalist Jasmine Moore’s Triple Jump Approach Technique Keys by Grant Young
- Build Strong Triple Jump Foundations with 3 Key Drills by William Markey
- Two Cues to Help With Track and Field Relay Handoffs by Grant Young
- Four Shot Put Drills to Help Develop Your Athletes by Grant Young
- Three Training Tips For Coaching 400m Runners by Grant Young
- Four Tips for Teaching the Javelin Throw by Grant Young
- 3 Pole Vault Check Points From Legendary Kansas Coach Tom Hays by Grant Young
- Two Valuable Hammer Throw Training Tips by Grant Young
- 3 Must-Try Offseason Shot Put Drills by William Markey
- Four Essential Tips For Coaching Track Relays and Sprints by Grant Young
- Florida Gators Coach Nic Petersen’s Two Keys for Teaching the Triple Jump by Grant Young
- Three Effective Drills for Improving the Long Jump by Grant Young
- Three Drills for Sprinters That Track Coaches Swear By by Grant Young
- Four Pole Vault Drills All Track and Field Coaches Should Know by Grant Young
- Explosive Track and Field Training to Level Up This Summer by Tyler Rathke
- Throwing Secrets: The Entry by Tyler Rathke
- How to Find an Endurance Athlete’s Proper Training Pace by Grant Young
- The Technique Behind Mykolas Alekna’s Discus World Record by Grant Young
- How to Build a Sprinter's Training Regimen by Grant Young
- How to Teach the Glide Shot Put by Grant Young
- Three Hurdle Drills All Track Coaches Should Know by Grant Young
- How Distance Running Coaches Can Get the Most Out of Their Athletes by Grant Young
- The Technique Behind Mondo Duplantis' Pole Vault World Record by Grant Young
- How to Coach Weightlifting For Increased Speed and Acceleration by Grant Young
The Ultimate Guide to Coaching Track and Field
Whether you’re stepping onto the track for the first time as a head coach or you’ve been guiding athletes for a season or two, this guide will equip you with practical strategies, training techniques, and motivational tools drawn straight from real-world coaches.
_________________________________________________________________________________________________________________
1. Foundations of a Successful Program
Every outstanding track program starts with well-defined expectations, a consistent structure, and a culture that values accountability.
Set Team Size & Standards
• Quality over quantity is key. Limit your roster size to ensure effective coaching.
• Instead of using punitive measures, consider tryouts or “programming cuts” to manage team size. Establish clear standards for your athletes. If your coaching staff is small, prioritize athletes who are eager to work hard and compete, rather than just those with the most talent.
Define Roles
• If you have assistant coaches, assign them based on their strengths (like throws or jumps).
• In situations with only one coach, empower senior athletes or experienced parents to take on “player-coach” roles. Let senior athletes lead warm-ups and help keep their teammates focused and on track.
Communicate Clearly
• Provide weekly schedules, practice goals, and meet expectations in writing.
• Encourage athletes to monitor their own times and workouts—this helps them take ownership of their progress.
_________________________________________________________________________________________________________________
2. Warm-Up & Mental Preparation
A solid team warm-up goes beyond just preventing injuries; it gets both the body and mind ready to perform.
Holistic Warm-Up (15–30 minutes)
Dynamic Movements: Forward A-skips, B-skips, high knees, and butt kicks.
Lateral & Backward Work: Karaoke, side shuffles, and backward high knees.
Prehab/Activation: Hip bridges, fire hydrants, 90/90 hip rotations, and plank rotations.
Sport-Specific Drills: Setting up mini hurdles (“wickets”), track strides, and bounding.
Mental Readiness
• Give athletes a moment to transition from classroom mode to performance mode.
• Include partner stretches or light group games to foster team spirit.
• Use cues like “good afternoon” or “prime time” during warm-ups to signal to athletes that it’s time to get to work.
_________________________________________________________________________________________________________________
3. Training Phases & Planning
Organize your season into clear phases to effectively balance building a strong foundation, enhancing speed, and reaching peak performance during competitions.

Weekly Structure
• Monday: Recovery/Easy (Varsity recovery vs. JV long run)
• Tuesday: Speed/Intervals or Hills
• Wednesday: Mid-long run (~20% of weekly mileage)
• Thursday: Sprint/Technical or Tempo
• Friday: Optional light run or rest
• Saturday: Races or simulation
• Sunday: Day off or optional easy run (depending on team culture)
_________________________________________________________________________________________________________________
4. Event-Specific Techniques
Throws: Tailored Warm-Up Routine
Before stepping into the ring, take the first 5–10 minutes after your general warm-up to focus on shot put-specific prep.
Key Focus Areas:
• Posture and body control
• Hand and wrist flexibility
• Mental transition from general warm-up to technical work
Drills to Incorporate:
• Standing throws that emphasize balance
• Wrist flicks and release mechanics
• Position drills that highlight a tall spine and core stability
Coach's Insight:
Make sure to dedicate extra time to wrist and hand preparation to avoid potential hand/wrist injuries.
Implementing Progression – From Heavy to Light
To enhance both strength and feel for the throw, the Coach suggests starting with heavier shots at the beginning of the season.
Progression Breakdown:
Heavy Shots – Build strength and identify balance weaknesses
Competition Weight – Fine-tune posture and rhythm
Lighter Shots – Concentrate on speed, timing, and release
Key Focus Areas:
• Use drills to sense positions throughout the throw
• Create a rhythmic “slow-to-fast” sequence
• Reinforce posture for a balanced, repeatable effort
Coach's Insight:
Using heavier implements is especially beneficial for glide throwers early in the season. They help challenge balance and timing before moving on to lighter balls as the season progresses.
Seasonal Throw Progression
Early Season:
• High volume of breakdown drills
• Focus on posture, balance, and control
Mid to Late Season:
• Fewer drills, more full throws
• Shift focus to rhythm, speed, and competition-specific cues
Throws & Power Drills – Phil Olson
Building power in the ring starts with rhythm, timing, and body control. For beginners, simplified drills lay the groundwork for more complex movements down the line.
Resistance Band Simulation Drill
Setup: Attach a long resistance band from the athlete’s waist to their throwing hand (or use a handheld version if needed). This simulates the movement pattern of a rotational throw.
Focus: • Reinforces full-body connection during the throw • Encourages a straight-line path from wind-up to release • Trains rhythm and force application through the legs and hips
Coaching Tip: Keep tension smooth—not jerky. Focus on turning the hips first, then shoulders, finishing with a tall release.
Half Power Block Drill – For Discus & Rotational Shot Put Put
Setup: From a half-power position (hips and shoulders open to ~90 degrees), have the athlete focus on timing the drive from the right foot with a strong block from the left arm.
Focus: • Hips open, left arm extended toward the sector • Right heel lifts, hip drives through the throw • Strong left-side block stabilizes and adds torque
Coaching Tip: If the shot/disc path is off-line, the athlete will lose speed and control. Emphasize finishing tall and keeping everything in a straight line.
Stick Drill to Power Position – Phil Olsonlson
Focus: • Simulates throw with stick or med ball • Emphasizes tall finish, full extension, and proper posture
For more great drills and teaching points for shotput and discus, check out Phil Olson's full clinic, ‘Discus and Shot Put Training for the Young Thrower’.
_______________________________________________________________________________________________
Jumps
High Jump Prep
• Monday: Speed/form runs & approach drills (shoulders back, hips forward).
• Tuesday/Thursday: Technical approach + 2–3 step drills, strength work.
• Wednesday: Speed endurance (e.g., 50-200m) to build runway tolerance.
Long/Triple Jump Daily
• 1-2 practice jumps integrated with team warmups—discover new talent.
Takeoff Position & Rhythm Drills – Brad Hackett

Getting the takeoff mechanics just right is crucial. Coach Hackett really stresses the importance of driving that swing leg, keeping the shin angle around 24 degrees, and hitting a strong, upright position at the board.
Progression:
One-Step Takeoff Drill
• Make sure to nail that takeoff posture every single time
• Cue: "Opposite jacket" – think of your arms and legs working together
Three-Step Pop-Ups
• Add some speed and rhythm while sticking to those takeoff mechanics
• Breathing cues: “Breathe to one, breathe to one”
Flight Drills & Arm Mechanics
These flight-phase drills are all about improving your posture, controlling your hang-time, and perfecting your arm action while you're in the air.
Drills:
• Walking Arms – Walk around with your arms mimicking the flight phase, keeping your posture tall
• Wall Plant Drill – Face a wall, simulate your takeoff and arm sweep while maintaining that tall stance
• Combined Pop-Ups – Connect those three-step pop-ups with your arm mechanics for real-time control
Landing Progressions
Landing is often overlooked, but bad form can really cost you distance. Coach Hackett has laid out three landing progressions to help teach extension and control.
Drills:
3-Step Jump to Bowl/Tire
• Helps athletes learn to land with arms up and legs extended
• Cue: “Land with the heels, dig with the toes”
Ankle Grab Landing
• Sprint down a 6–8 stride approach, jump, grab your ankles midair, and land in the pit
• This builds awareness of body positioning and full extension
Seated Landing Drill
• Sit on a box or chair, lean back, and reach forward with your arms and legs
• Get a light push from a teammate to help you reach even further
Coach Tip:
When you land properly, you should leave even marks in the sand—your heels, hands, and hips should all be in line. If your toes leave a drag mark behind your heels, it means you didn’t fully extend.
These drills can be practiced year-round, even if you don’t have access to a sand pit. For more technical cues, posture adjustments, and in-place progressions, check out Brad Hackett’s full clinic ‘Long Jump Skills & Drills’.
_________________________________________________________________________________________________________________
Sprints & Acceleration
3-Point Starts & Acceleration Mechanics – Jerome Missaien
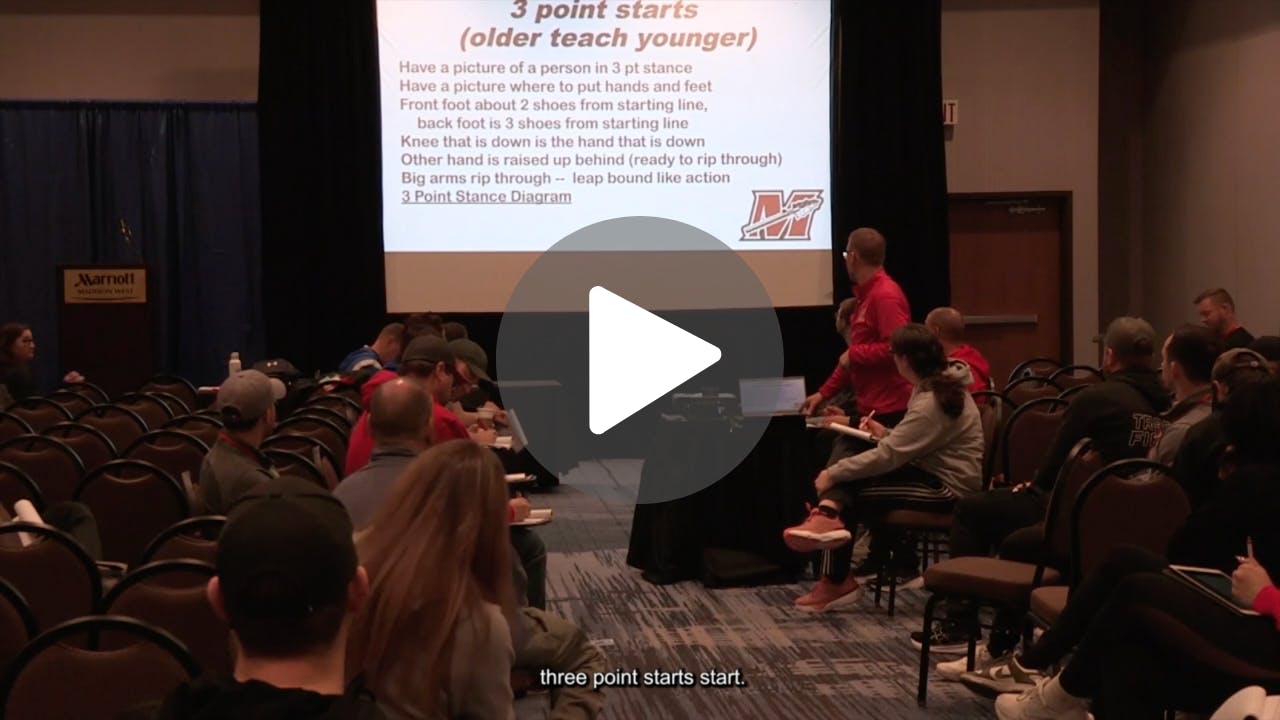
Mastering the sprint start isn’t just for elite athletes; it’s a crucial skill for any runner looking to boost their acceleration. Coach Missaien shares a straightforward, easy-to-follow method for establishing a solid 3-point start and seamlessly incorporating it into your sprint drills, even if you don’t have blocks.
Setting Up a Reliable 3-Point Start
Coach Missaien introduces a simple approach to help athletes build consistency from the ground up:
Drill Setup 1: Chalk Line Method
1. The athlete positions themselves at the starting line.
2. Measure back two shoe lengths and mark that spot with chalk (this is for the back foot).
3. Measure one more shoe length back and mark that for the front foot.
4. The athlete then squats into position without shifting their feet.
Coaching Cues:
• The knee that’s down corresponds to the hand that’s down.
• Form a triangle with your feet and hand.
• The hand should be placed 2 to 2.5 feet in front of the front foot.
• Cue: “Pivot forward” to shift the shoulders over the front hand.
Drill Setup 2: Line Mark Method (No Chalk Needed)
Utilize lines on the gym floor or track:
• Position the back heel on one line and the front toe on the next.
• Drop into the same squat-based setup.
• Emphasize launching forward rather than upward.
Teaching Acceleration with Focus
Coach Missaien stresses the importance of isolating one technique at a time. For instance:
• Arm drive: Use the cue “Split! Split! Split!” and focus solely on that aspect.
• Launch angle: Concentrate on hand and shoulder positioning without critiquing the feet.
• Celebrate small victories—repetition fosters rhythm and builds confidence.
Coach Tip:
Encourage older athletes to mentor younger ones on this drill. It not only strengthens team culture but also reinforces technical consistency.
Acceleration Days
• Incorporate simple drills like cone pickups, short relays, and reaction balls.
• Focus on “long ground contacts” and hip drive, keeping fancy equipment to a minimum.
Wicket Drills for Mechanics
• Set wickets 5 to 6 feet apart to promote vertical push and proper hip height.
• Cue “push vertical to go forward” to prevent overstriding and braking.
Flight & Recovery Position
• Keep heel recovery tight (close to the glutes) and raise the knee to torso height.
• Foot strike under hip—avoid landing in front. _________________________________________________________________________________________________________________
Relays & Handoffs – Ramon Smith
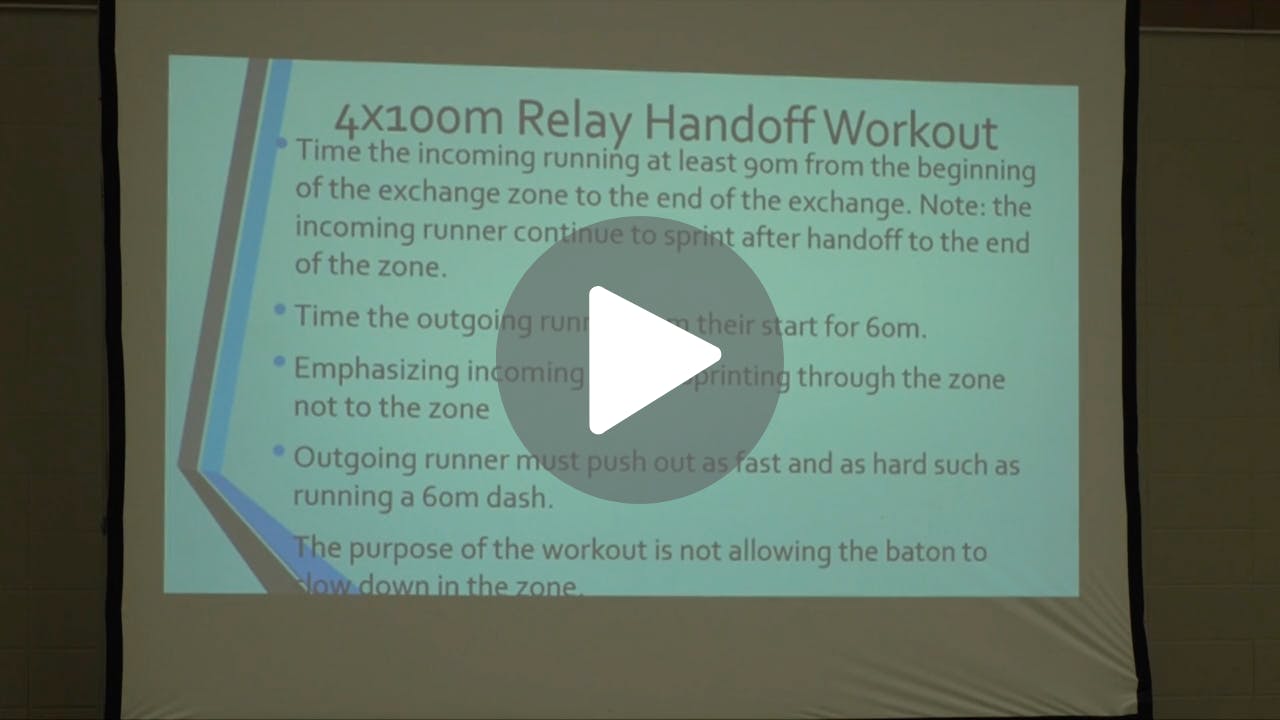
4×100 Blind-Silent Exchange
For the outgoing runner, keep your fingers together, palm facing out, and thumb pointing down. The incoming runner should push the baton firmly into the target hand. Make sure to mark 15–17 paces from the zone entry for the outgoing runner, and use a heel-toe mark for the incoming runner. When running curves, right-hand sticks are the way to go; for straightaways, stick to the left-hand.
4×400 Exchange
• Start with three strong acceleration strides, then turn your head to receive the baton.
• Don’t forget to practice under lactic fatigue, like at the end of 500m repeats.
_________________________________________________________________________________________________________________
Distance Training
A Full-Season Plan for the 1600/3200
Training distance athletes goes beyond just building endurance; it’s about layering aerobic development, honing speed endurance, and cultivating a mindset geared for championship racing. Whether your runners are focused on the 1600, tackling the 3200, or competing in both, a well-structured progression throughout the year is key to laying the groundwork for success.
Season Overview: Periodization for Distance Runners

Weekly Training Template (Typical 7-Day Pre- or Mid-Season Week)

Mileage Guidelines by Athlete Type

Training Principles for Developing Championship Runners
Start with the Aerobic Base
Take your time with intervals—use December and early January to build your mileage, refine your mechanics, and enhance your running economy.
Begin Race Modeling Early
Once your athletes are fit, it’s time to practice race segments:
- 3×1600m at 3200 pace
- 2×1200m + 2×400m for a 1600 breakdown
- Last-lap simulation workouts
Pace Discipline is Key
Athletes need to understand the feel of race paces—not just focus on the splits. Incorporate threshold work and tempo reps to help them find their rhythm.
Recovery is Part of Training Too
Easy days, rest days, and low-mileage Fridays are essential for keeping athletes healthy and on track.
Confidence: The Hidden Mileage
Confidence isn’t solely built by smashing workouts—it’s also about winning those small moments. Focus on:
- Feeling smooth during reps
- Running negative splits
- Finishing strong even when fatigued
- Controlling a race simulation
Coach Tip: Highlight when things are going well. Celebrate execution, not just the outcomes.
Late-Season Peaking: Fresh Legs, Sharp Minds
By April, your athletes should be in great shape. Now, it’s all about tapering volume and reinforcing rhythm.
Mileage Reduction:
- Cut weekly volume by 25–30% over the last three weeks.
Workout Focus:
- Keep the intensity high, but reduce the number of reps
- Prioritize recovery over volume
- Incorporate confidence-building sessions—faster surfaces, less volume, and a bit more rest
Championship Confidence Workout Example
Mid-Season: 8 × 800m on grass with 2:00 rest → Average 2:35
Peak Phase: 6 × 800m on track with 3:00 rest → Average 2:28
_________________________________________________________________________________________________________________
5. Strength & Conditioning
Building Systems in Large Groups – Adam Vogel
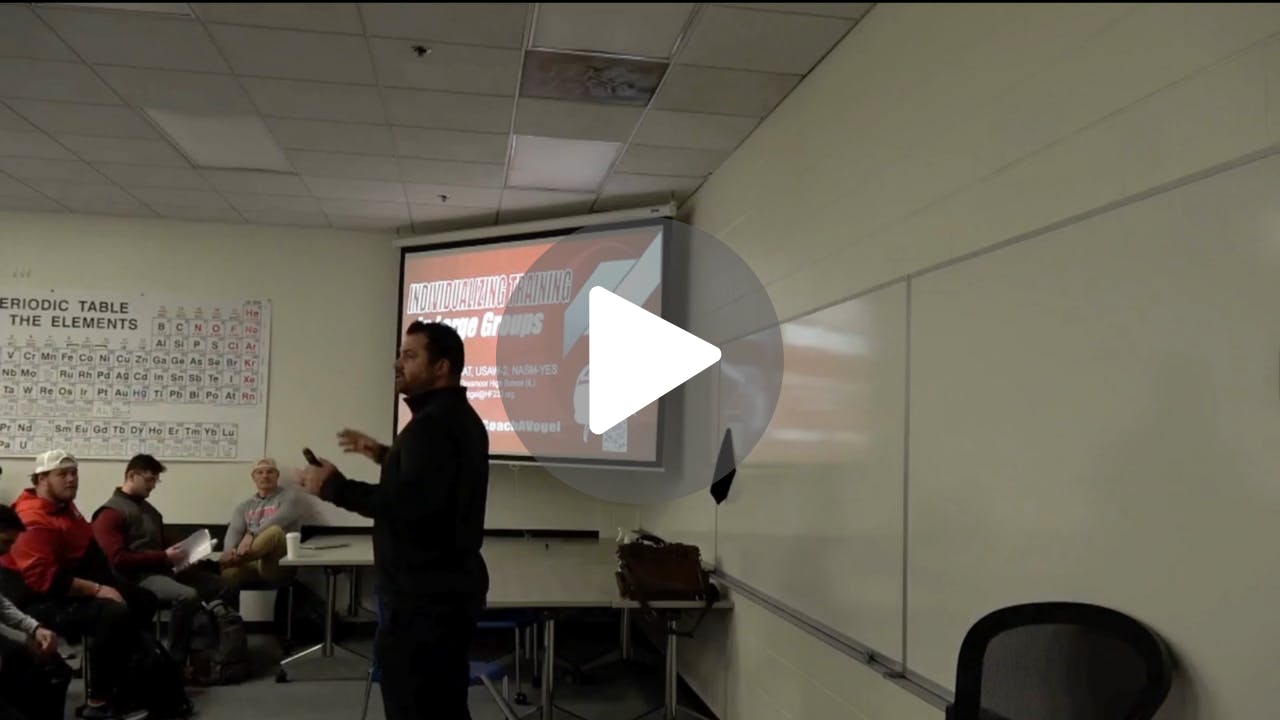
Effective strength training isn’t just about having access to a high-end gym or personal training sessions—it's really about having a solid structure, staying consistent, and being able to adapt to the needs of athletes as they progress. Coaches are sharing their insights on how to tailor training for groups of 40 to over 100 student-athletes by using clear systems, progressions, and fostering leadership development.
Organizing the Chaos: Training Structure by Season
In-Season (Maintenance Focus)
• Shorter lifting sessions (25–35 min)
• Focus on movement quality, bar speed, and athlete readiness
• Swap out volume for mobility, activation, or targeted recovery
Off-Season (Development Focus)
• Full sessions (35–45 min + warm-up)
• Key lifts: squat, hinge, press, pull
• Accessory work tailored to needs: mobility, power, or hypertrophy
Sample Split (4-Day Week):
Day 1: Total body power + upper strength
Day 2: Speed & plyometrics + lower lift
Day 3: Recovery focus or mobility work
Day 4: Full body complex or Olympic lifts + sprint technique
Smart Grouping: Tiered Levels for Athlete Progression
Tier 1 (Freshmen & Beginners)
• Emphasis on form, bodyweight progressions, and learning movement patterns
• Typically follow a unified program
• Focus heavily on mobility, tempo reps, and volume over load
Tier 2 (Sophomores – Developing Athletes)
• Start using barbells, velocity-based cues, and set targets
• May begin to tailor training based on specific sport needs
Tier 3 (Upperclassmen & Advanced Athletes)
• Individualized variations for goal-oriented work (strength, power, lean mass)
• Options for auto-regulation (rep ranges, RPE, jump height)
• Take on leadership roles to mentor younger athletes
Individualizing Within the Group
Correctives & Mobility Swaps
• Got tight hips? Swap out the “B2” accessory lift for some banded hip openers
• Shoulder issues? Try replacing the dumbbell press with landmine variations
Extra Volume (The Right Way)
• Athletes looking for “extra lifts” are guided on how to add volume smartly
• Coaches provide templates that align with recovery needs, not compete with them
• Avoid training fatigue by ensuring the right balance
Use “Athlete Coaches” • Juniors and seniors help run warm-ups, demonstrate lifts, and lead small pods • Encourages team buy-in, accountability, and program ownership
Making It Work Without the Perfect Facility
No rack? No worries! These coaches have found ways to get it done:
• In hallways (think core work and movement prep)
• In shared gyms (partner circuits and low-equipment stations)
• On turf with sleds, bands, and medicine balls
Coach Tip:
Forget about perfection. Focus on consistency. The best programs foster trust, progression, and a strong culture—regardless of how much space you have.
For more training insights, templates, and system design strategies, be sure to check out Adam Vogel’s full clinic ‘Individualizing Large Groups.’
_________________________________________________________________________________________________________________
6. Athlete Development & Autonomy
Empowering Athletes
• Have them keep track of their times, distances, and notes.
• Promote self-reporting (“Did you finish your long run? What was your split?”). Get team captains or senior athletes to create a Strava group for accountability.
Peer Coaching
• Assign captains to specific groups (like distance, sprints, jumps).
• Let a senior thrower or jumper help run drills and do video analysis.
Parent Volunteers
• Bring in knowledgeable parents for event-specific coaching (like vault setup or video feedback).
• Make sure they have basic certification if your district requires it.
_________________________________________________________________________________________________________________
7. Practical Tips for Small-Staff Programs
Limit Team Size
• Set roster caps and run efficient large-group drills (all athletes across a goal line).
Multitask
• Pair distance athletes with their runs while working on field event drills.
Senior Leaders
• Turn your top performers into “player-coaches” under your guidance.
Low-Cost Drills
• Use cones, sticks, tennis balls, and mini-hurdles—you don’t need fancy gear to build speed.
_________________________________________________________________________________________________________________
8. Bringing It All Together
Plan Your Season: Outline the different phases, peak times, and recovery periods.
Build Culture Daily: Incorporate warm-ups and mental preparation to foster team buy-in.
Drill with Purpose: Every stick drill, hurdle wicket, and relay exchange should have a specific technical goal in mind.
Empower Athletes: Allow them to take charge of their logs, assume leadership roles, and track their progress.
Adapt & Evolve: Analyze video footage, data, and athlete feedback. Make adjustments to wicket spacing, weekly mileage, or timing strategies as needed.
With a solid plan, intentional drills, and a nurturing environment, you’ll witness tangible improvements in sprints, distance, jumps, and throws. Keep in mind that consistency in the basics and open communication are your secret weapons for success.
Good luck out there on the track—let’s make this season the best one yet for your athletes!

